
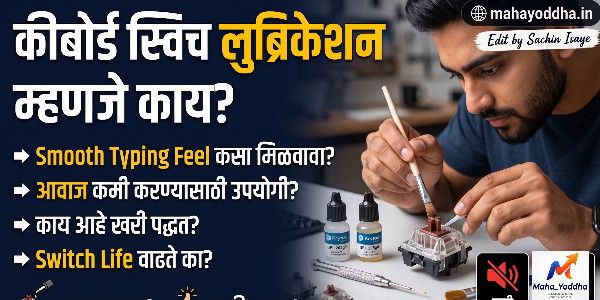
Switch Lubing पहिल्यांदा Try केलं — Result Surprisingly Good होता, पण Process बद्दल कुणी Honestly सांगत नाही
Brown switch mechanical keyboard वापरतो Mahayoddha.in साठी. Six months perfect होता.Keyboard Switch Lubrication.
मग एक दिवस एका key मधून “scratch-scratch” आवाज यायला लागला. “S” key specifically. इतर keys fine होत्या. नवीन keyboard घ्यायचा नव्हता — बाकी सगळं perfect होतं.
Switch lubing बद्दल YouTube वर research केलं. “10 मिनिटात keyboard premium sound येतो” असे videos दिसले. Tempting होतं.
वास्तविकता — चांगलं result येतं, पण “10 मिनिटे” हे misleading आहे. Full keyboard साठी दोन ते तीन तास minimum.
आज Mahayoddha.in वर switch lubing honestly explain करतो — काय आहे, actually कसं होतं, आणि तुम्ही करायला तयार आहात का याची real picture.
Switch Lubing म्हणजे काय — एकदा समजलं की Logic Clear होतं
Mechanical switch मध्ये stem plastic housing मध्ये slide होतो. Plastic-on-plastic contact friction create करतो. New switch मध्ये manufacturing tolerances tight असतात — scratch feel येतो.
Lubrication म्हणजे sliding surfaces वर thin viscous layer apply करणं. Friction कमी होतो. Sound changes — “scratchy” ऐवजी “smooth thock.” Feel premium होतो.
Spring मध्ये पण issue असतो — spring vibrates when released. “Ping” sound येतो. Spring lubing हे eliminate करतो.
Analogy: Dry door hinge creak करतो. Oil लावल्यावर smooth opens silently. Switches similar principle.
कोणता Lube कोणत्या Switch साठी — हे Critical आहे
Wrong lube use केला तर switch worse होतो — feel mushy होतो, tactile bump destroy होतो.
Linear Switches (Red, Yellow, Speed)
Krytox 205g0 — Thick viscous grease. Premium choice. Amazon India वर किंवा imports मध्ये मिळतो. ₹५०० ते ₩१,५०++ per small jar. एक jar पूर्ण keyboard साठी पुरतो.
Permatex Dielectric Grease — Budget alternative. Hardware stores मध्ये मिळतो. Texture थोडी different, पण acceptable results.
Linear switches साठी thick lube OK आहे — smooth feel maximize होतो.
Tactile Switches (Brown, Clear, Tactile variants)
Tribosys 3203 किंवा 3204 — Thinner viscosity. Tactile bump preserve होतो.
Thick lube tactile switches वर — bump “muted” होतो. Brown switch च्या characteristic bump कमी होतो. हे avoid करा.
Critical rule — Tactile switch च्या bump legs (stem च्या side projections जे housing ला contact करतात bump साठी) वर lube लावू नका. Absolutely avoid.
Clicky Switches (Blue)
Clicky switches generally lube करत नाहीत. Click mechanism alter होतो. Avoid.
Springs
Krytox GPL 105 — Oil form. Bag method साठी. Spring ping eliminate करतो. Mandatory नाही, पण nice upgrade.
Tools लागतात — आधी तयार ठेवा
Switch opener — ₹१०० ते ₩२०० मध्ये मिळतो Amazon वर. Alternatively flat tool carefully वापरता येतो, पण opener faster आणि safer आहे.
Fine brush — Art brush, size 00 किंवा 000. Painting section मध्ये मिळतो. ₹५० ते ₩१०० मध्ये. Switch meme community मध्ये “keeb brush” म्हणतात.
Tweezers — Springs handle करायला.
Small containers — Stems, springs organize करायला.
Lubing station — Optional पण useful. Stems hold करायला platform. 3D printed options आहेत, किंवा DIY cardboard जगाड.
Lighting — Good light लागतो — fine work आहे.
Process — Honestly किती वेळ लागतो
One switch lubing — ३ ते ५ मिनिटे initially. Practice नंतर — २ मिनिटे per switch.
Full sixty key keyboard — initially दोन ते अडीच तास. Experience नंतर — दीड तास.
Hot-swap keyboard असेल तर — switches keyboard मधून काढता येतात individually.
Soldered keyboard असेल तर — desoldering लागतो. हे significantly complex आहे.
Step by Step
Step एक — Switch काढा
Hot-swap keyboard — switch puller वापरा. Pull करा, switch निघतो.
Soldered — desoldering pump किंवा wick लागतो. या article चा scope बाहेर आहे.
Step दोन — Switch उघडा
Switch opener च्या prongs housing च्या side tabs वर ठेवा. Gently press — top housing निघते. Alternatively: दोन flat tools, gentle prying.
आत दिसेल — top housing, bottom housing, stem, spring.
Step तीन — Parts separate करा
Stem काढा — bottom housing मधून.
Spring काढा — bottom housing मधून.
Four parts: top housing, bottom housing, stem, spring.
Step चार — Bottom Housing Rails Lubing
Bottom housing च्या आत दोन vertical rails आहेत — stem इथेच slide होतो.
Brush मध्ये minimal lube घ्या. Rails वर thin even layer.
“Less is more” — genuinely. Excess lube — mushy feel, slow actuation.
Step पाच — Stem Lubing
Stem च्या side legs — rails ला contact करणारे surfaces — lube करा.
Tactile switch असेल तर — bump legs avoid. फक्त smooth contact surfaces.
Top of stem (contact point with top housing) — optional, thin layer.
Step सहा — Spring Lubing (Bag Method)
सगळे springs एका small zip-lock bag मध्ये.
GPL 105 oil — ३-४ drops bag मध्ये.
Bag seal करा. ३०-४५ seconds shake करा.
Springs काढा — paper towel वर spread करा. Excess oil wipe करा.
Step सात — Reassembly
Bottom housing → spring place करा → stem insert करा → top housing close करा.
Closing — gentle press, “click” आवाज — locked.
माझा Personal Experience — काय झालं
“S” key scratchy होती. फक्त ती एक switch lube केली — keyboard मधून काढली, process केली, परत लावली.
Immediate difference. Scratch gone. Sound smooth.
Temptation आलं पूर्ण keyboard करायला. एका weekend मध्ये सगळे switches केले — approximately ७५ switches, साधारण ३ तास.
Before/after difference — noticeable आहे. सगळ्या switches consistent झाले. “Thock” sound आला scratch sound ऐवजी. Premium feel genuinely आला.
Mahayoddha.in साठी articles लिहिताना typing experience noticeably better आहे.
Honest assessment — Worth it for heavy users. Casual users साठी unnecessary.
Mistakes जे पहिल्यांदा होतात
जास्त Lube
Most common mistake. “जास्त smooth = जास्त lube” हे wrong आहे.
Excess lube — switch feels “dead,” sluggish, mushy. Re-clean करावं लागतं — isopropyl alcohol, completely dry, re-lube correctly.
Tactile Bump वर Lube
Brown switch वर thick lube — bump disappears. Switch becomes pseudo-linear. Tactile feedback गेलं.
Wrong Lube
WD-40, silicone spray, cooking oil — absolutely avoid. These damage plastic, incorrect viscosity, attract dust, degrade over time.
Spring Lubing Excess
Bag मध्ये जास्त oil — spring coils मध्ये oil accumulates — thick slow feel.
Lubing vs Not Lubing — Comparison
| Factor | Un-lubed Switch | Lubed Switch |
|---|---|---|
| Sound | Scratchy, sharp | Smooth, deeper thock |
| Feel | Slightly rough | Silky smooth |
| Spring Noise | Ping possible | Near zero |
| Tactile Feedback | Normal | Same (if done correctly) |
| Durability | Good | Better (less friction) |
| Time Investment | Zero | 2-3 hours full keyboard |
| Cost | Zero | ₹५०० ते ₩२,०++ |
| Necessity | Usable | Upgrade, not necessity |
FAQ
Q. Factory lubed switches already आहेत — पुन्हा lube करायला हवं का?
Factory lubing बऱ्याच times inconsistent असतं. काही switches over-lubed, काही under-lubed. Premium keyboards — Glorious, Keychron — better factory lube. Budget keyboards — re-lubing improvement देतो. Feel check करा — scratchy असेल तर lube करा.
Q. Lube Indian market मध्ये available आहे का?
Krytox 205g0 आणि Tribosys 3203/3204 India मध्ये easily नाही मिळत. AliExpress, Amazon global shipping options आहेत. Dielectric grease (Permatex) hardware stores — Midas, automotive shops — मध्ये मिळतो. Alternative म्हणून acceptable.
Q. Lubing नंतर कितपत improvement जाणवतो?
Depends on switch quality. Cheap scratchy switches — dramatic improvement. Premium smooth switches — subtle improvement. New users ला difference clearly जाणवतो. Existing lubed keyboards वर difference subtle.
Q. Hot-swap नसलेल्या keyboard वर lubing possible आहे का?
Possible पण requires desoldering — सोल्डर station, wick/pump, PCB damage risk. Beginner साठी recommend नाही. Hot-swap keyboard असेल तर lubing easy आणि safe. Future keyboard घेताना hot-swap feature consider करा.
Q. Lubing करून switch warranty goes away का?
Officially modifications warranty void करू शकतात — depends on brand policy. Practical reality — switch failure after lubing difficult to distinguish from regular failure. High-end keyboards — warranty claim through official channels. Budget keyboards — warranty rarely claimed anyway.
Conclusion
“S” key scratchy होती म्हणून lubing शिकलो. Single switch fix केला. Temptation येऊन पूर्ण keyboard केला. तीन तास गेले weekend ला. Genuinely worth it होतं माझ्यासाठी — daily heavy typing करतो.
Mahayoddha.in वर articles लिहिताना typing experience cumulative आहे — हजारो words daily. Premium feel typing enjoyable करतो, fatigue कमी करतो.
Casual user साठी — lubing necessary नाही. Heavy user साठी — weekend project म्हणून try करण्यासारखं आहे.
तुमचा keyboard scratchy आवाज करतो का? Spring ping येतो का? Comment मध्ये सांगा — specific situation नुसार advice देता येईल.

Sachin Isaye
सचिन इसाये
नमस्कार! मी सचिन इसाये, Founder of Mahayoddha.in. २०१७ पासूनच्या माझ्या Blogging आणि Digital Content क्षेत्रातील अनुभवाचा वापर करून, मी Keyboard, Typing Speed, Windows Shortcuts आणि Digital Skills यांसारख्या विषयांवर सोप्या मराठीत practical माहिती देण्याचा प्रयत्न करतो.
Keyboard Buying Guide, Mechanical Keyboard, Wireless Keyboard, Keyboard Problems, Keyboard Typing Skills आणि Keyboard Ergonomics यांसारखे विषय सामान्य मराठी वाचकांना सहज समजावून सांगणे, हेच माझे काम आहे.
विद्यार्थी, Bloggers, Content Writers, Office Users, Work From Home करणारे आणि नवीन computer users यांना keyboard वापरून आपलं काम जलद, सोपं आणि smart करता यावं, हेच माझं ध्येय आहे. नवीन Keyboard Guides, Typing Tips आणि Windows Shortcuts साठी Mahayoddha.in ला नियमित भेट द्या.